
Place the first layer on your cake board or plate. Spread a thin layer of buttercream over the top, then pipe a ring of buttercream around the edge to make a border (a buttercream dam) – this is what keeps the filling from leaking out.
Spoon about ½ cup of chilled raspberry filling inside the border and spread it gently to the edges without breaking the dam.
buttercream dam around the cake to prevent cake from collapsing
raspberry filling inside the dam shown from overhead view
Add the second layer and repeat: thin layer of buttercream, buttercream border, ½ cup filling in the center. Place the third layer on top upside down so the flat bottom becomes the top of the cake.
If you’d like extra help with this part, my guide on how to stack cake layers walks through stacking, leveling, and filling with photos and troubleshooting.
5. Crumb Coat, Chill, and Final Coat
Spread a thin layer of buttercream over the entire cake (sides and top) to catch any loose crumbs. This is your crumb coat – a quick but essential step that keeps crumbs out of your final frosting layer.
Third and final vanilla cake layer placed upside down on top of assembled cake so the flat base creates a level top surface
It doesn’t need to look perfect – it just needs to cover everything. Chill the cake for about 20 minutes until the frosting is firm to the touch.
Once the crumb coat is set, add a thicker, final layer of buttercream, smoothing the sides with a bench scraper and the top with an offset spatula.
White chocolate buttercream final coat being smoothed along the sides of the layer cake using a bench scraper on a rotating turntable
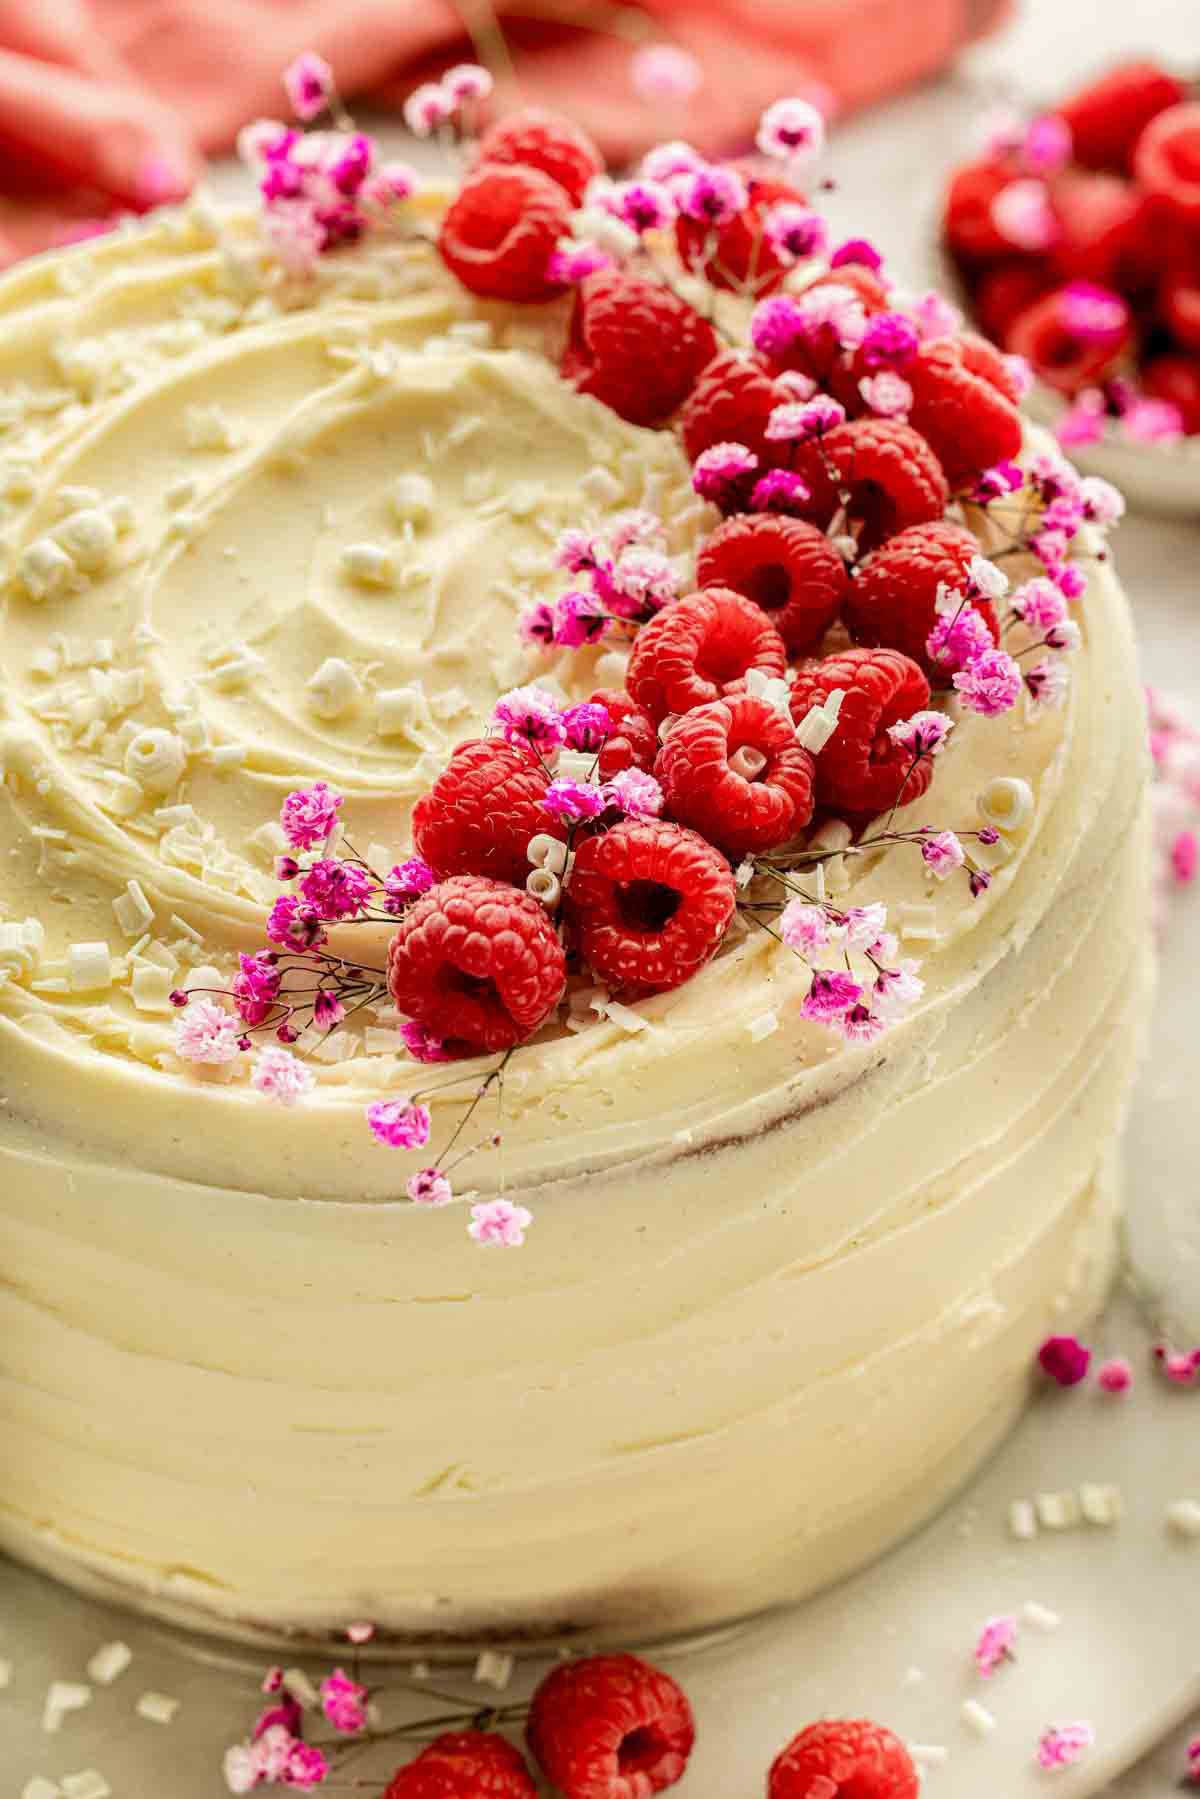
Decorate with fresh raspberries, white chocolate curls, and small flowers just before serving.
sliced raspberry cake showing all layers, raspberry filling and toppings
White Chocolate Raspberry Cake
A buttery vanilla layer cake with homemade raspberry filling cooked to a jam-like set and a white chocolate buttercream made with real chocolate. Serves 12-14 and holds its shape through assembly, transport, and serving.
CLICK on STARS to REVIEW the RECIPE, then CLICK OK
4.95 from 18 votes
Print Pin
Course: DessertCuisine: AmericanKeyword: cake, chocolate cake, chocolate raspberry, chocolate raspberry cake, layer cake, raspberry cake, raspberry white chocolate layer cake, spring birthday cake recipe, white chocolate buttercream, white chocolate cake, white chocolate raspberry cake Prep Time: 30minutes minutesCook Time: 30minutes minutesTotal Time: 1hour hour Servings:
12
Author: Olya Shepard
Ingredients
Raspberry Filling
1½ tablespoon water
1¾ tablespoon cornstarch
3 cups raspberries fresh or frozen
⅓ cup granulated sugar
1 teaspoon lemon juice
Cake
3⅔ cups all-purpose flour
1 teaspoon salt
2 teaspoon baking powder
¾ teaspoon baking soda
1½ cups unsalted butter softened
2 cups granulated sugar
3 large eggs room temperature
2 egg whites room temperature
1 tablespoon vanilla extract
1½ cups buttermilk room temperature
White Chocolate Buttercream
1½ cups unsalted butter softened
9 oz white chocolate melted and cooled
5½ cups powdered sugar
6 tablespoon heavy cream
1½ teaspoon vanilla extract
pinch salt
Decoration
fresh raspberries
white chocolate curls
spring flowers
US Customary – Metric
Instructions
Make Raspberry Sauce
Start by making the raspberry filling so it has plenty of time to cool and thicken.
In a small bowl, stir together the water and cornstarch until completely smooth with no lumps. Add this to a saucepan along with the raspberries, sugar, and lemon juice. Set the pan over medium heat and cook, stirring regularly. As the raspberries heat, gently press them with your spatula to help them break down.
Once the mixture comes up to a boil, let it bubble for 5 minutes, stirring occasionally, until it becomes thick and glossy. It should look like a loose jam. I fit starts to look a little too thick or dry during the boiling time you can add a splash of water.
Remove from the heat. Transfer the filling to a shallow dish, press plastic wrap directly onto the surface, and place it in the refrigerator to chill until completely cold and thickened.
Make Cake Batter
For Complete Cooking STEPS Please Head On Over To Next Page Or Open button (>) and don’t forget to SHARE with your Facebook friends
ADVERTISEMENT

